Today in class, we are:
Working on books!
For next time:
Be ready to print (if you haven’t printed yet)
Working on books!
Be ready to print (if you haven’t printed yet)
Talking about your book’s covers
Talking about making a full proof, including things to be looking for before you finish your book
Talking about due dates
Working!
Work to have your cover design finished
Work to have your book ready to print and bind
Get any supplies you need to buy (paper, different thread, etc.)
Looking at your blank books
Talking about paper in general
Talking about paper for your books
Talking about book covers
Going over some typographic details to take care of
Bring in cover design options
Turn in your Corita postcards to Google Drive
Be getting things ready to be done!
Learning a bookbinding method
Talking about detailed type and how to work with it in Indesign
Talking about revised book schedule, seen here.
Choose a binding method – saddle-stitch or stab binding – and make a blank/scrap book the dimensions of your book using that binding method.
Make progress on getting your book’s details right.
Add a title page, colophon, and any other book parts you’re currently missing.
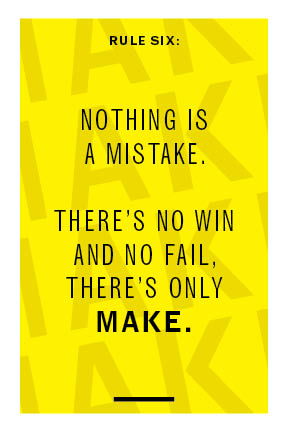
For this short project, we’re making 12 postcards (4 variations each on 3 different rules from Corita Kent).
We’re then uploading and getting feedback on those, narrowing those down.
Then, we’re refining them to make 2 variations each.
Today in class, we have a couple things you can do remotely:
Today, export a PDF of your book progress. I’m excited to see how far you’ve all gotten and if you’ve made progress with your images.
If you haven’t gotten to 15–20 pages, or if you don’t know where you’re ending it, do that today. Then make your PDF.
Here’s what to do:
If you don’t know how to export a PDF already, there are instructions here: https://helpx.adobe.com/indesign/how-to/indesign-create-pdf-for-print.html
Use these settings:
• Preset: High quality print (the top dialog in the Export window)
• Range: this is which pages you’re exporting. Export just the pages you’ve finished. So, in this box, you might have 1-20 or something similar. If it gives you grief, just export the whole thing (it’s better if you don’t, but it’s fine)
• Check the box for Spreads, so you’re exporting as spreads.
Then watch these videos as preparation + inspiration for our letterpress workshop (they’re also just good things/people to know about).
The videos are here.
Read the readings from Thinking with Type I put online Tuesday.
Some of this information is directly related to what we’re doing. If something gives you a new idea or leads you to a slightly rethink what you’re doing in part of your book (which it might!) start applying that new thinking to your book.
Figure out your book length (approximately).
Figure out where you want to cut your text off. You need to cut off at a reasonable point like between chapters, between sections, etc.
You should have at least 8,000 words. You’re welcome to go over 15,000. But you probably don’t want to bind a book that goes over 50 pages. There’s a lot of room between 8,000 words and 50 pages for you to decide where you want to cut off the text.
To count words in Indesign:
http://www.indesignskills.com/skills/word-count-indesign-document
Once you find the place you want to cut off the text, you don’t need to try to delete other text for now. Instead, for now, just insert a frame break (https://helpx.adobe.com/indesign/using/editing-text.html#add_column_frame_and_page_breaks)
We’ll talk about finalizing that break later.
If you’re using images, work on those.
I’ve talked to some of you about images, and told most of you something like “these can wait.” Well, I’m changing that a bit. So, if you’re including images or thinking about them, you can start putting those in.
Follow guidelines (and tips!) for finding/using images from Images for Your Book
Looking at book comps
Talking about making proofs
Talking about these Indesign skills:
Working
Create a 15 page proof of your book
Looking at your mockups
Talking about low-resolution mockups
Talking about comps for the Book project
Talking Indesign
Working on book comps
Finish your 3 sets of book comps
Looking at your Type Specimens
Talking about making books
Examining books and making mockups of books
Make 8 paper mockups for your books. These mockups should be full sized paper versions of a spread for your book. They should have margins drawn/specified, page numbers, running headers, and anything else your page will need.